


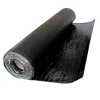

- Synthetic Thatch Tiles parameters such as length, width and slope to determine the laying area and installation location of the simulated thatched tile. According to the measurement results, mark on the roof, plan the laying area and arrangement of thatch tiles.
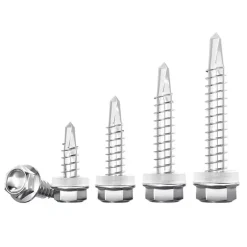
- Determine the position of the hook.: According to the installation requirements and design plan of the simulated thatched tile, determine the fixed position of the hook on the roof base. Generally speaking, the distance between the hooks should be determined according to the size and weight of the thatched tiles. Usually, a hook point is set every 30 – 50cm to ensure that the thatched tiles can be firmly fixed on the roof.
- Installation of simulated thatched tiles
- cut thatched tile: According to the size and shape of the roof, use a cutting tool to cut the simulated thatched tiles into a suitable size and shape. In the cutting process, pay attention to keep the edges of the thatched tiles neat to avoid burrs or cracks, so as not to affect the installation effect.
- Place thatched tiles: Place the cut simulation thatched tile on the predetermined position on the roof to make it fit closely with the roof base. In the process of placing, pay attention to the direction and angle of the thatched tile to ensure that it can present a natural and realistic effect.
- Use tie hook to fix: Hold the handle of the hook with one hand, align the head of the hook with a predetermined fixed position, and insert the hook into the roof base. Then, the edges or specific parts of the simulated thatched tiles are hung on the hook to fix the thatched tiles on the roof. If necessary, some fixing materials, such as nails or screws, can be added to the hook to enhance the fixing effect.
- adjustment and finishing
- check fixing condition: After installing a part of the simulated thatched tiles, check the fixing condition of the hook to ensure that the thatched tiles are firmly fixed on the roof without loosening or falling off. If it is found that the hook is loose or the thatched tile is not fixed firmly, it should be adjusted and reinforced in time.
- Tidying up the thatched tile look: Use a tool or hand to gently comb the surface of the simulated thatched tile to give it a natural, fluffy effect. At the same time, check whether the arrangement of the thatched tiles is neat and beautiful. If there are any irregularities, they should be adjusted to meet the design requirements.
- Final work
- clean up the construction site: After the installation is completed, clean up the construction site, clean up the remaining simulated thatched tiles, hooks and other construction materials and garbage, and keep the construction site clean and tidy.
- Inspection and acceptance: Comprehensive inspection and acceptance of the installed simulated thatched tiles to ensure that the installation quality meets the design requirements and relevant standards. The inspection includes the fixed condition, appearance effect and waterproof performance of the thatched tile. If problems are found, rectification shall be carried out in time until the acceptance is qualified.


Reviews
There are no reviews yet.