

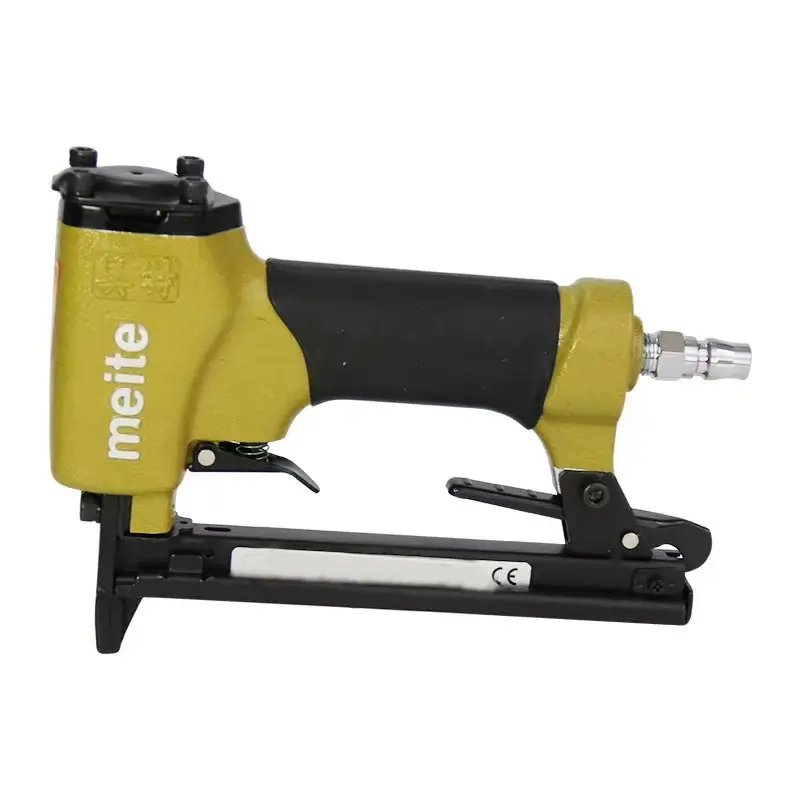
- Choose the right code nail gun and code nail
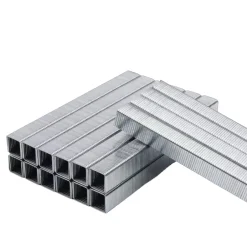
- according to the material and thickness of the synthetic thatch tile, select the appropriate model of the code nail gun. For example, for a thinner thatched tile, a smaller size nail gun can be used to avoid damage to the thatched tile; for a thicker or harder thatched tile, a larger nail gun needs to be selected. At the same time, it is necessary to ensure that the specifications of the code nails match the code nail gun. For example, 422U code nails are often used to fix thatched tiles, and their size and shape are suitable for the fixing needs of most synthetic thatched tiles.
- Check the working status of the code nail gun to ensure its normal operation. Including checking the air pressure (for pneumatic code nail gun), spring elasticity, and whether the nail box is smooth, etc. If it is a new nail gun, you need to test it first to get familiar with its operating performance.
- Prepare other materials and tools
- prepare a sufficient number of synthetic thatch tiles and check whether their quality and size meet the requirements. At the same time, prepare auxiliary tools such as tape measure, scissors or saw (for cutting thatched shingles), protective gloves and goggles.
- Ensure the safety of the installation site, clean up the sundries in the work area, and ensure the smooth progress of the construction process.
Installation Process
- positioning and planning
- use a tape measure and other tools to measure the size of the roof or installation area, and determine the laying method of the thatched tiles and the location of the code nails according to the size and design requirements of the synthetic thatched tiles. Generally, starting from the eaves, it is laid in a certain order and spacing, such as setting a code nail position every 15 – 30cm.
- Mark the edge of the installation area or the starting position to provide clear guidance for subsequent installation.
- Filling code nail
- open the nail magazine of the code nail gun and put the code nails into the nail magazine neatly. Note that the direction of the code nail should be correct. Generally, the opening direction of the U-shaped code nail should be consistent with the direction of the gun mouth to ensure that the code nail can be smoothly ejected.
- Close the nail box and check whether the code nail is firmly installed to avoid falling of the code nail during use.
- Adjust the parameters of the code nail gun (if necessary)
- for the pneumatic code nail gun, it is necessary to connect the air source and adjust the air pressure. According to the material and thickness of the synthetic thatch tile, adjust the air pressure appropriately. If the thatched tile is thin or soft, the air pressure should be appropriately lowered to prevent the code nail from penetrating the thatched tile; if the thatched tile is thick or hard, the air pressure can be appropriately increased to ensure that the code nail can firmly fix the thatched tile.
- Some code nail guns can adjust the nail depth, and adjust the nail depth to the appropriate position according to the actual situation. The purpose is to enable the code nails to firmly fix the thatched tiles without excessive penetration and affecting the appearance and performance of the thatched tiles.
- Installation synthetic Thatch Tiles
- the first piece of synthetic thatched tile is placed in a predetermined position, usually starting from the bottom of the eaves. Align the nozzle of the code nail gun to the position where the thatched tile needs to be fixed, and keep the nozzle perpendicular to the surface of the thatched tile, so as to ensure that the code nail is shot vertically and the fixing effect is better.
- Gently pull the trigger of the code nail gun, shoot the code nail, and fix the thatched tile on the base (such as roof board, wall, etc.). According to the pre-planned code nail position, in turn fixed thatched tile. In the fixing process, pay attention to the uniform spacing of the code nails to ensure that the thatched tiles are firmly fixed and the appearance is neat.
- When laying the second and subsequent synthetic thatch tiles, pay attention to overlapping with the thatch tiles laid in front of each other to achieve better waterproof and aesthetic effects. The overlapping part also needs to be fixed with a code nail gun to ensure tight connection between adjacent thatched tiles.
inspection and adjustment
- Check the fixing effect
- after installing some or all of the synthetic thatch tiles, check the fixing of the code nails. Gently pull the thatched tiles with your hands to check for looseness. If a loose thatched tile is found, it is necessary to repair the nails in time to ensure that each thatched tile is firmly fixed on the base.
- Check the appearance quality
- observe the installation effect of synthetic thatch tiles from different angles, and check whether the arrangement of thatch tiles is neat, with or without warping or deformation. If it is found that the appearance does not meet the requirements, such as uneven laying of thatch tiles, uneven position of code nails, etc., it needs to be adjusted in time to achieve the ideal visual effect.


Reviews
There are no reviews yet.